Category: food

My SteakTartare that might just blow your brains out

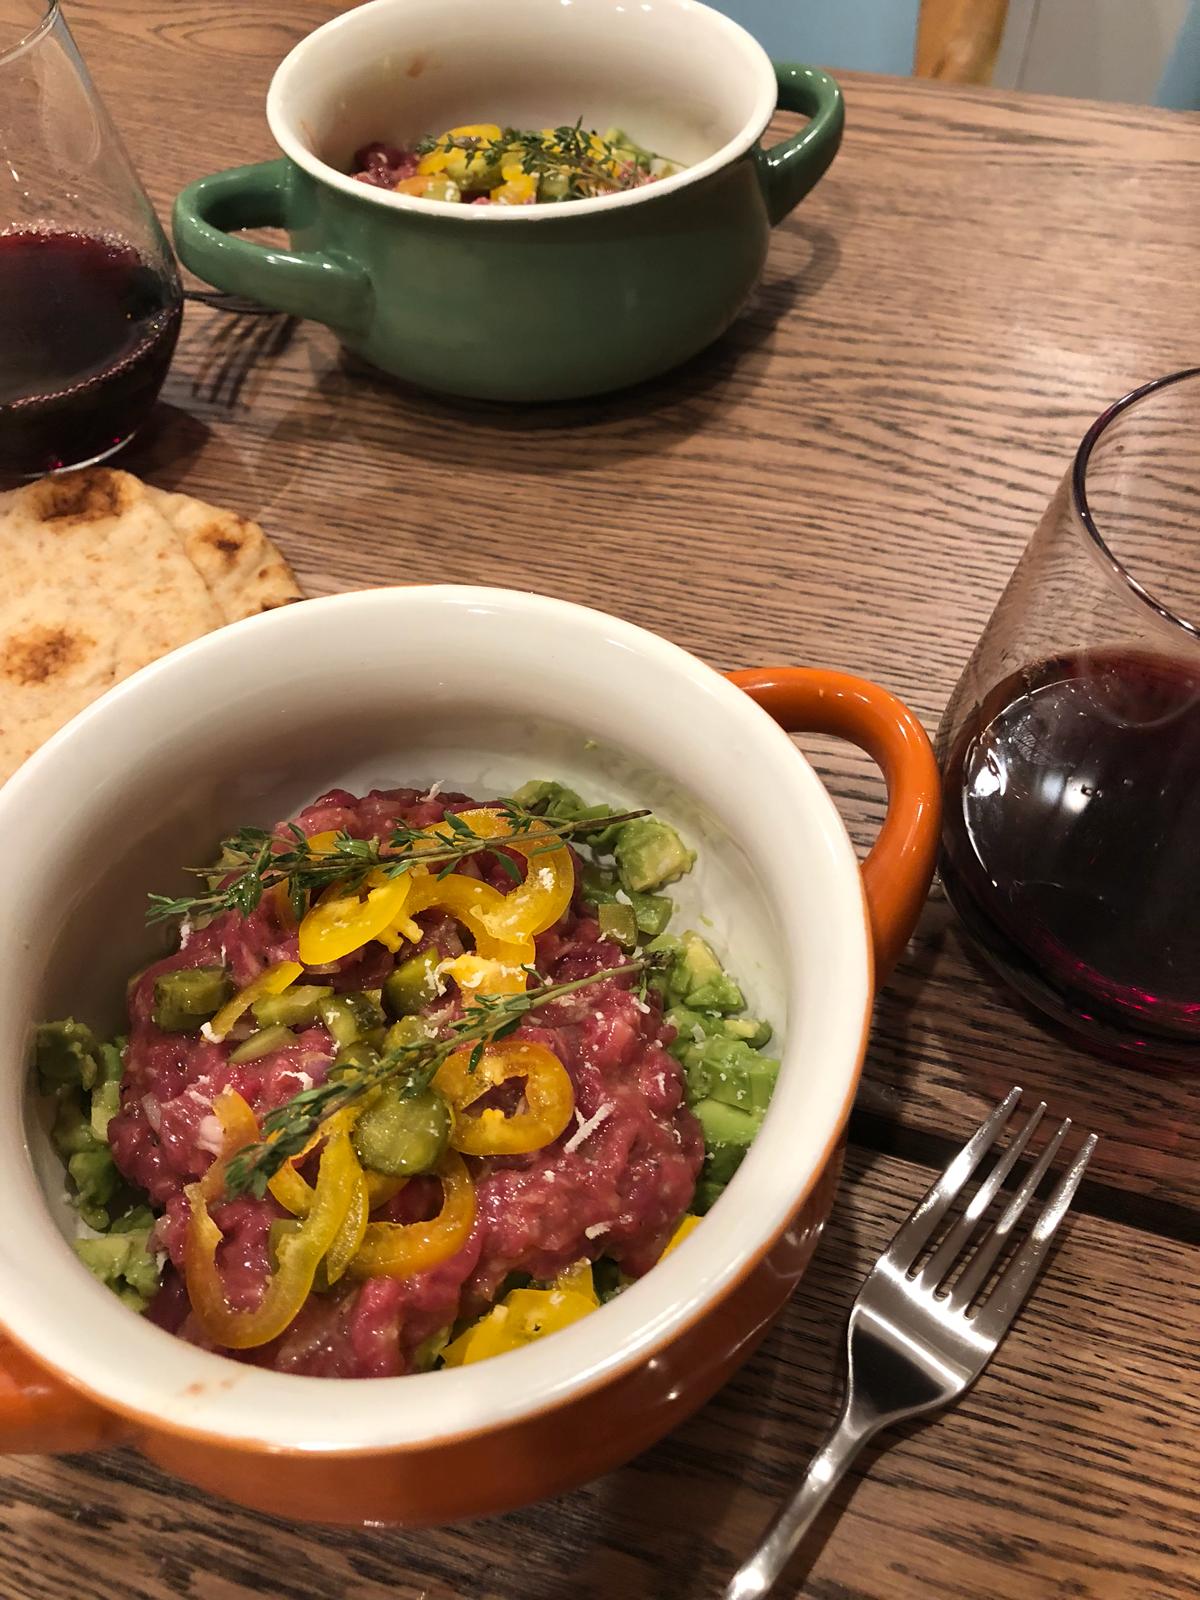
Idit said it was one of the best steak tartare she’s had in years, and as a reputable foodie (her, not me), that was music to my ears, enough to share the recipe with Y’all. Much like almost any dish, “the” secret is in fresh and high-quality ingredients. Here goes:

Serving 2-3:

Key ingredients

  • 250 gr (~0.5lb) finely chopped filet mignon
  • 1 avocado, finely diced
  • 1 small shallot, finely chopped
  • My choice of carbs: Freshly baked & chubby (Pita-like) Naan bread

Dressing for the meat

  • 3/4 tbsp Dijon mustard
  • 3/4 tbsp sriracha
  • 1/2 tbsp honey
  • 3/4 tbsp Yuzu sauce (alternate with lemon if not available, but highly recommended)
  • 1 tbsp olive oil
  • 1 egg (don’t break into the dressing! add to the mix before serving!)

Garnish + extra kick

  • 3 finely chopped cornichons (those cute tiny pickles)
  • 1 small yellow pepper (can be spicy but not mandatory – you have enough spiciness, theoretically)
  • Thyme
  • Grated Parmesan cheese

Preparation:

  1. Put the meat in the fridge while preparing the rest, take it out no more than 3 minutes before serving
  2. Add 1 tbsp of lemon extract to the finely chopped avocado, mix up
  3. Take out the meat, mix with dressing, including the egg and chopped onion. Mix well until you get a smooth and consistent texture.
  4. Plate with avocado as a base, add the meat atop the avocado, add coarse salt and freshly ground pepper, sprinkle the garnish and gently place the thyme on top + some olive oil for closure. You can add Parmesan on top for one last enhancement.
  5. Serve with the Naan bread for perfect scooping

Although seemingly complex, this one is actually pretty easy. Try it and let me know how it went. BONAP!


P.S Winners’ tip: add light-bodied red wine to guarantee a transcendental experience 🙂

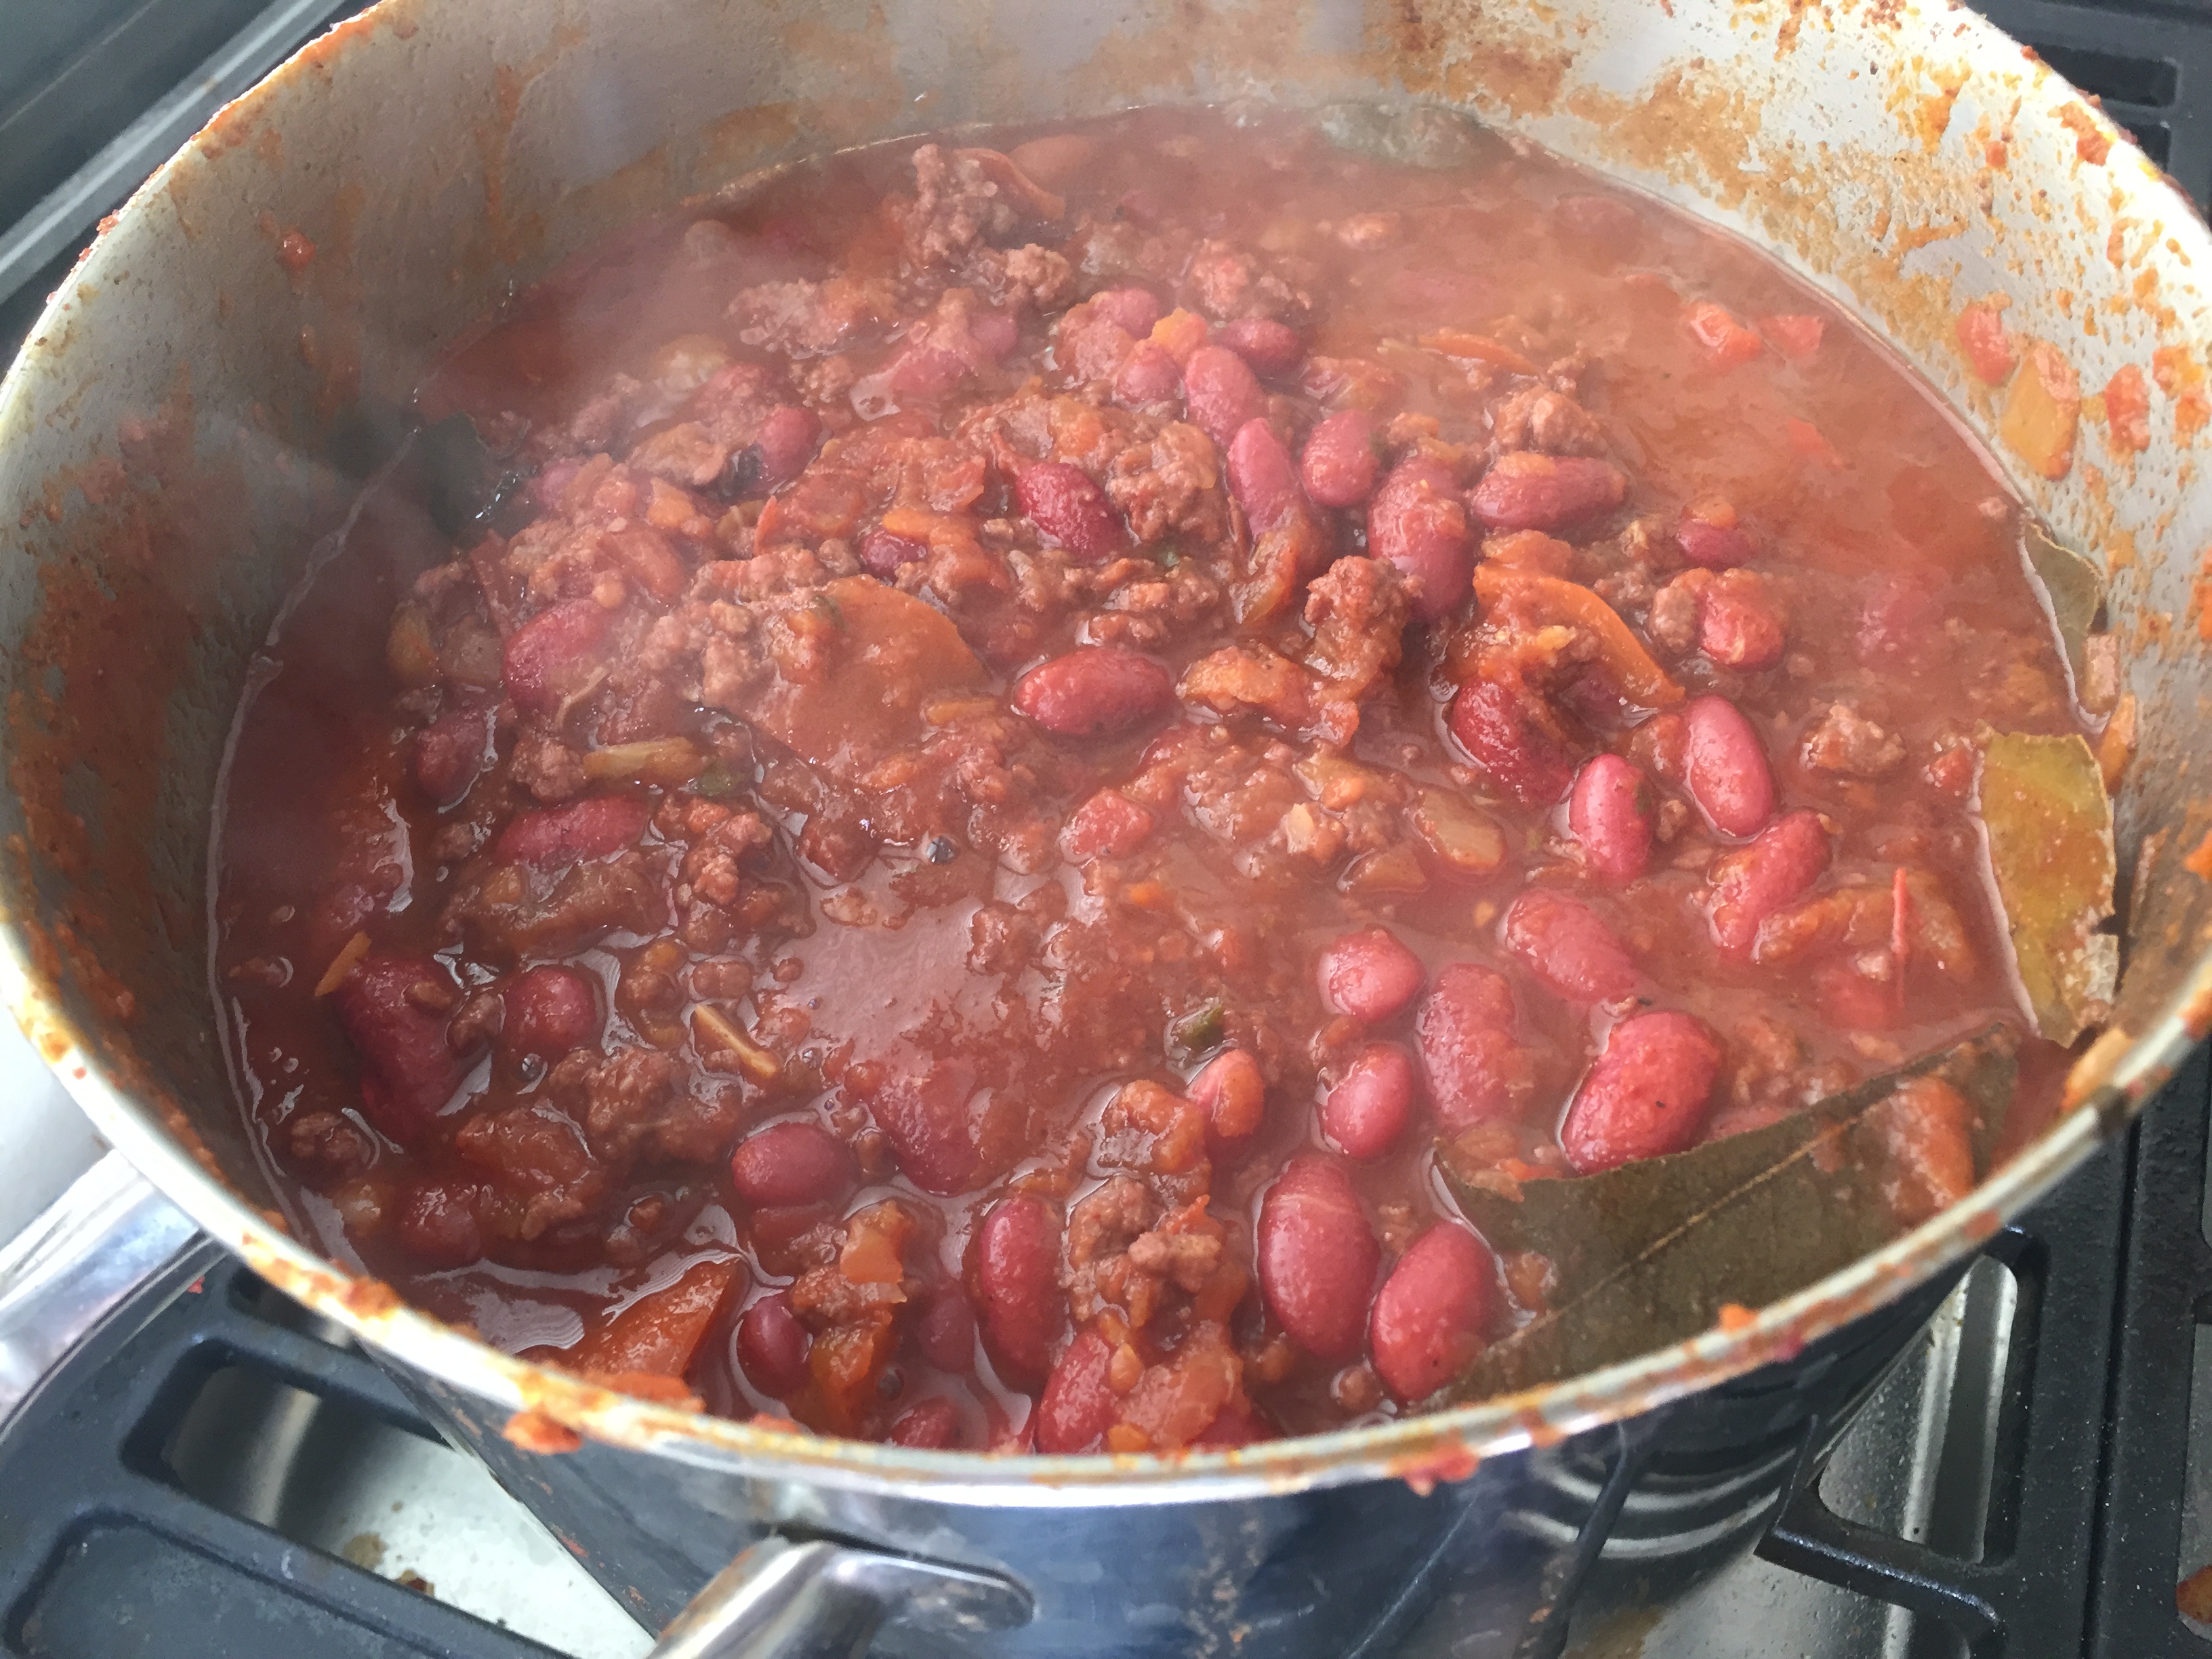
Chilli Con Carne that makes you go OMG

A bunch of weeks ago I was thinking to myself: “Well, you never really gave the adequate amount of attention to Mexican cuisine”.

And so I decided to make a properly cooked Chilli Con Carne, with no compromises (all fresh ingredients). The recipe is for mild spiciness, if you like to make it hotter, just add more Chili and use hot Paprika 🙂

Ingredients:

  • 2 mid-sized carrots – peeled, shredded
  • 7-8 Garlic cloves – peeled, chopped
  • 1 large onion – sliced
  • 3 red bell peppers – diced
  • 1 KG of minced beef
  • 500 GR of brown beans (can mix it 250/250 with white beans – leave in tepid water overnight, then strain and wash carefully before cooking)
  • Bay leaves 
  • Cumin powder
  • Paprika (sweet or hot, whatever you prefer)
  • Chilli powder (McCormick is great!) 
  • 1 glass jar of Mutti sauce (or any other fresh tomato puree)
  • Sour cream

This one serves about 10 hungry people but you might want to consider adding some guac to it: 3 mashed ripe avocado, chopped spring onion, chopped coriander, chopped red onion, thinly diced cherry tomato, olive oil, salt, pepper, 1 squeezed whole lemon

Preparation:

  1. Add 2 tbsp. of olive oil into a large pot, throw in the garlic and onion and cook for 2-3 minutes (careful not to burn them), then add the carrots and peppers.
  2. Let them cook for a few minutes, while stirring, until they slightly soften.
  3. In the meantime fry the beef in a hot pan (use 2 tbsp. of canola oil), season with salt and pepper and stir until the meat is sealed (just until there are no visible red spots – don’t cook it through)
  4. Add the meat to the fried veggies and cook for 2 more minutes
  5. Add seasoning: 2 tbsp. of cumin, 3 tbsp. of paprika and 3 tbsp. of chili powder, add salt, pepper and 2 tbsp. of sugar (or 3 tbsp. of date honey)
  6. Add the beans and bravely stir with so it all soaks up the seasoning
  7. Pour the jar of Mutti sauce, + the bay leaves and stir some more.
  8. Add water (you can use tap-water, if you have beef-stalk that’s better) to cover it all and cover.
  9. Let it simmer, then put on low-medium fire for ~2 hours
  10. Stir every 10 minutes to keep it from sticking or burning at the bottom
  11. You will most probably need to add at least 5-6 more tbsp. of chili powder during those 2 hours. Trust your taste buds and don’t be skimpy with the chili powder. for this amount you should “waste” anywhere between 1/3 to 1/2 the dispenser (i.e. equivalent to 1/3-1/2 a cup).
  12. Adjust with salt, pepper and sugar. be patient. it’s only ready when all the liquid is reduced and it has this mash-like appearance (see photo). 
  13. After you’re done, let it sit for at least 20 minutes so the ingredients suck-in the taste.
  14. Once ready, serve with Guacamole and decorate with sour cream.
  15. Bonapetit! 

P.S – it tastes best after sitting in the fridge for a night or two… Enjoy 🙂

If you did happen to use my recipe, I’ll gladly accept your comments and photos!

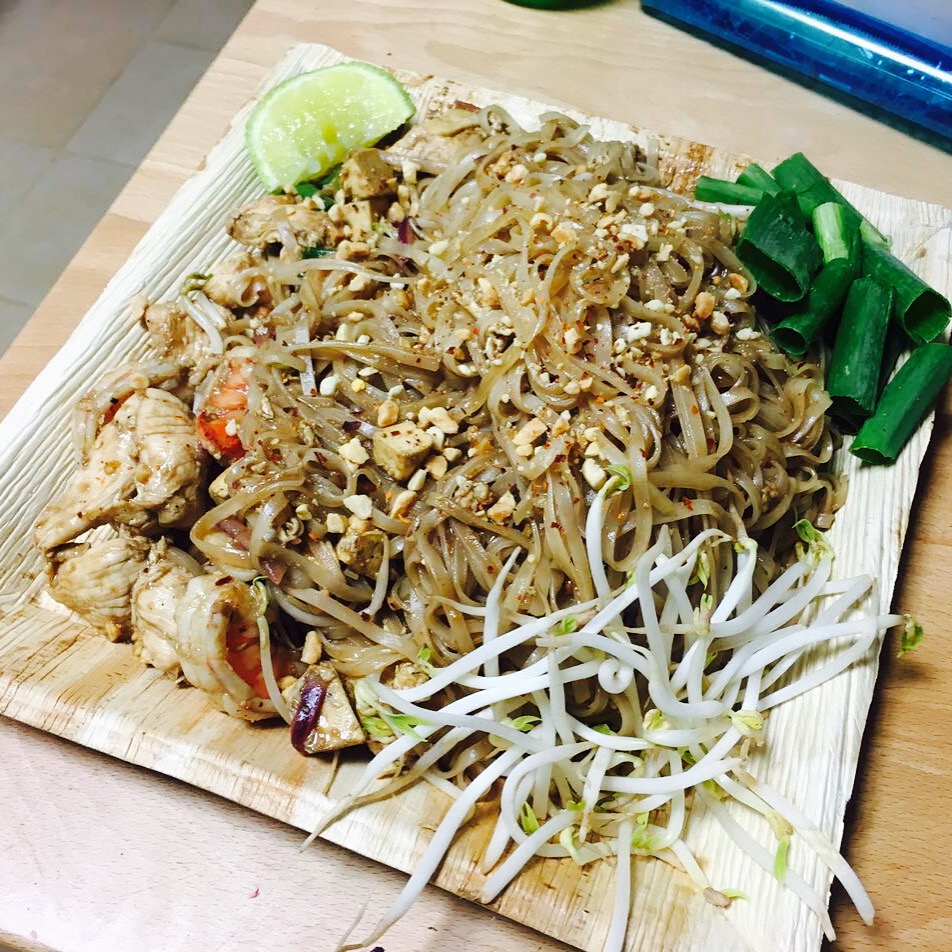
Pad Thai, for real. Like you’re in Thailand

I love Thai food. It’s one of my favorite cuisines. It’s just so quick, accessible and delicious.

up until not so long ago I wasn’t really aware of the importance of technique (especially being meticulous about timing and order). Well, it makes a HUGE difference.

Here’s something I picked up while watching several online Thai cooking techniques, and proclaimed as my own, all because of a little twist 🙂

That’s how you’ll make Pad Thai that tastes like Thailand (or the wonderful Thai food scene in NYC):


  • Preparation time: 15-20m
  • On the fire: 5-7m
  • Serves: 2-3 people

Ok. First, you’re gonna need a wok. If you don’t have one go buy one and get back here. Mine was actually bought in Thailand and it’s made out of tin (I think) that is very light and thin.

Ingredients:

For the concentrate / sauce:

  • Tamarind
  • Lime juice
  • Sriracha
  • Palm sugar / regular sugar / date honey

And.. My secret ingredient… Peanut butter!

For the dish:

  • Tofu
  • 1 Garlic clove
  • 1/2 Shallot
  • 100gr. Shrimp
  • 150gr. Diced Chicken
  • 1 Egg
  • 1/2 pack of Sticky rice noodles
  • Bean sprouts
  • 1 Spring onion
  • Crushed peanuts
  • Chili flakes
  • Lime

The magic happens really fast so it requires alertness, but first we need some prepping:

  1. First, soak the rice noodles in tepid water for 2 hours, so they soften.
  2. Then, prepare the sauce in a bowl or anything you feel comfortable whisking in: mix the 4 ingredients in the following proportions: 3 tablespoons of tamarind, 6 tablespoons of sugar (or equivalent. I prefer date honey), 2 tablespoons of lime juice and a few squirts of Sriracha. Then add 1 tablespoon of peanut butter. Taste it. If one flavor is too dominant, try balancing with the missing tastes. The only somewhat dominant ingredient should be sugar, and you’re good.
  3. Give it a good whisk.

On to the dish:

  1. A generous portion of oil (not olive oil!!!) to the wok. Fire to max.
  2. let it warm up, then throw in the tofu. Just a few blocks, nothing too dramatic. Unless you’re a vegetarian/vegan in which case try to improvise.
  3. after a minute, add in the finely chopped garlic and shallots (sliced thin vertically, not chopped). Stir and stir some more for about 30 seconds, Then add the protein (chicken and shrimp) and stir until it’s nicely seared (but not cooked through). Push it all aside and drop the egg in the empty space. Let it fry for ~10 secs and then start breaking it (like you’re making scrambled eggs). Then mix it with the rest.
  4. Now, add the noodles. Stir a lot! At least 1 minute. Then add the sauce and stir until the entire mix absorbs the color and there’s no visible liquid at the bottom. Add the crushed peanuts, roughly chopped spring onion and a skimpy handful of bean sprouts. Also, add the Chili flakes (to taste. It really affects spiciness). It’s usually not more than a pinch.
  5. Stir like there’s no tomorrow. After about 2 minutes, it’s done!
  6. Empty the wok into a large plate, and add: 1/4 lime (don’t squeeze, let them do it if they wish to), some leftover spring onion, bean sprouts and chili flakes in the 4 corners of the plate respectively. Spread some more crushed peanuts generously.

And… Voila! Let me know how it was!

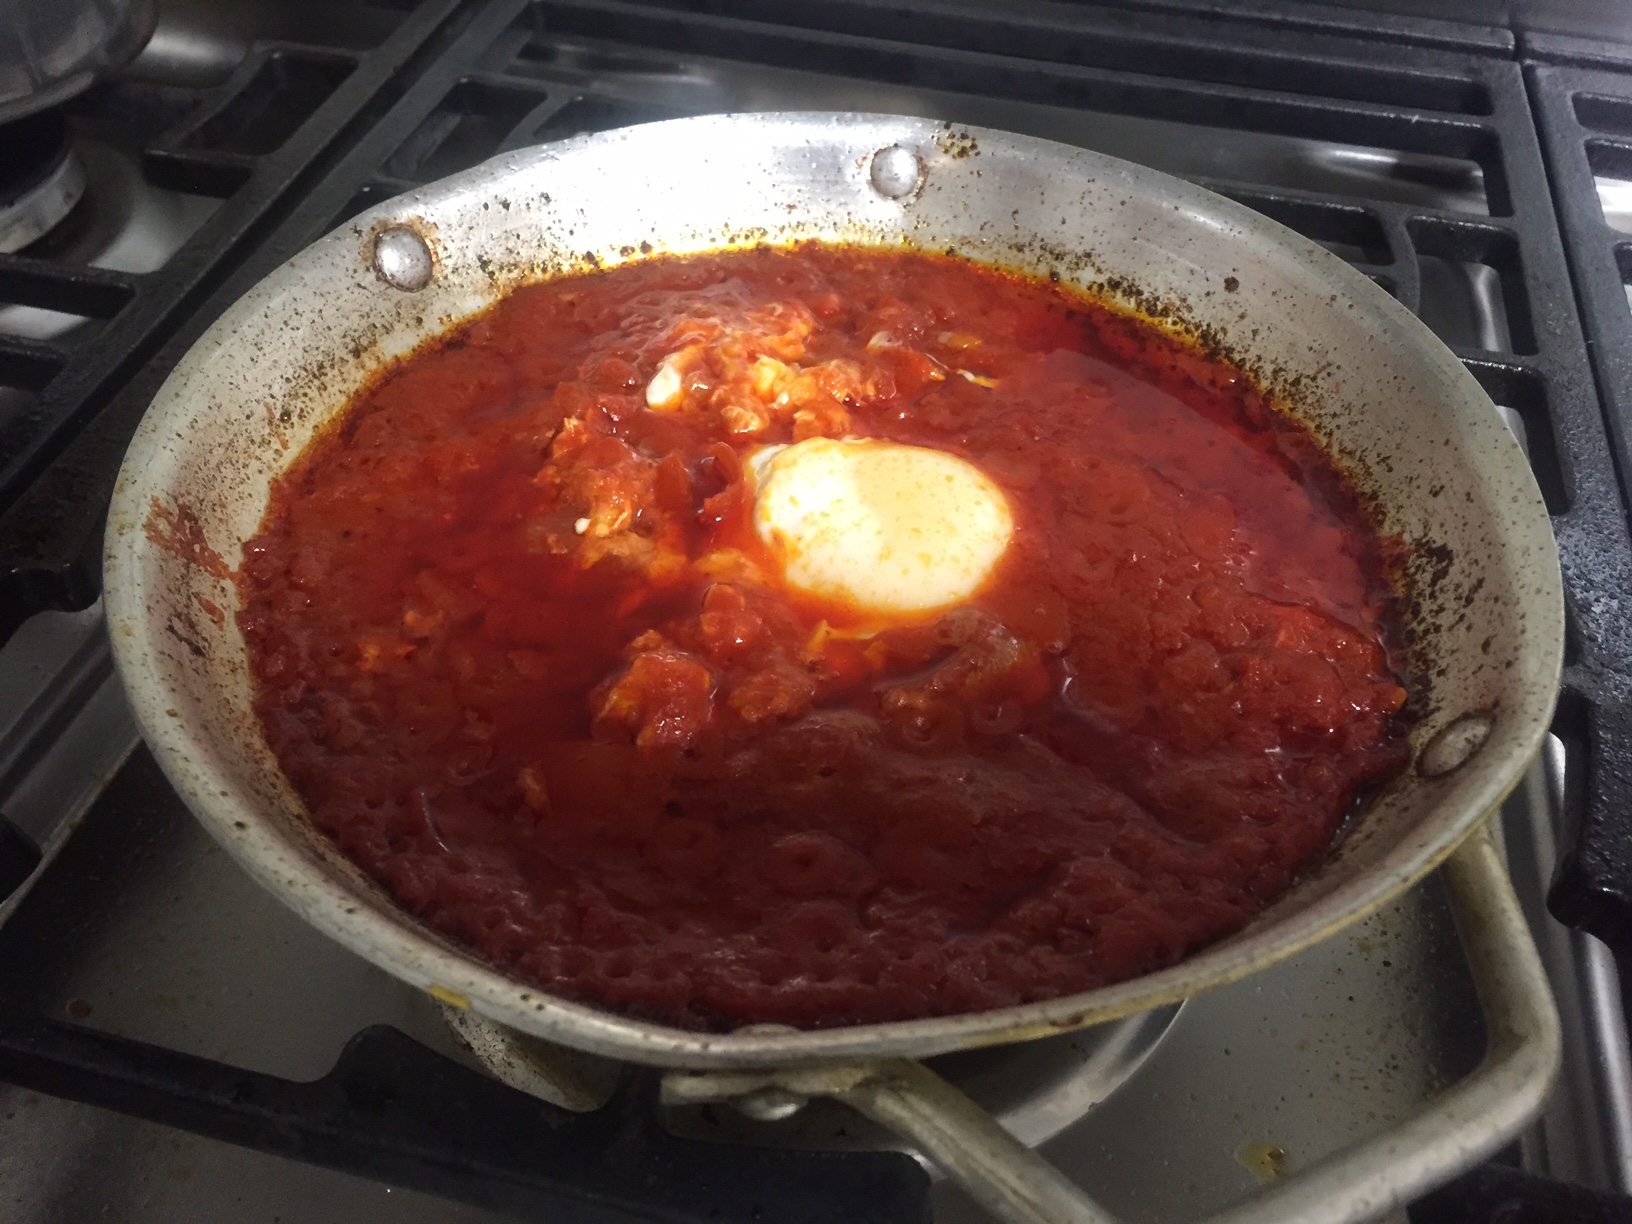
Always start with some good food: my own authentic Shakshuka

Hi folks! This post was actually my first ever guest post at a close friend’s blogdump, and now it’s the first post in my OWN blog 🙂 next I’m going to discover The Backstreet Boys, an exciting new band… 😉

Ok, so – I feel there’s nothing better than introducing my own secret (shhhh…) recipe for a traditional Mediterranean Shakshuka (fried tomato+egg dish) with what you probably have in your house. well, except for maybe tomato puree. go get it.

Now, when I cook, I usually prefer to work harder but make smaller portions. the dish is much better when cooked in small quantities because it’s easier to control and fine tune, every little thing counts: the cookware, the spices, the technique. let’s hope you enjoy this dish at least as much as I do:

To serve 2 you’re gonna need:
Firstly, you’re gonna need a tin skillet/pan, about 8″ in diameter. yes. tin. it sears it all real good. if you can’t get one just use any pan. don’t use a pot.

Ok, now the ingredients:
1 large clove of garlic. finely chopped
2 ripe (!!) chubby tomatoes, gutted and diced (as in, take out the inside and throw it away. that’s 1/2 of the secret to the taste…)
2 eggs
100% natural tomato puree (not paste, not sauce, not juice. puree).
Fresh black pepper
Salt
Sugar
Paprika
I also add Sriracha sauce or Jalapinio pepper, to spice things up. you don’t have to tho.
alternatively you can add goat cheese, feta cheese, or even sausages. I don’t.

Here’s how it happens:
pour a thick layer of olive oil (don’t be cheap!) to the pan, fire on max. this thing is going quick & painful (for the pan…)

let the oil warm up, then throw the garlic in. let it fry for 10 seconds, or at least until you sense that they would imminently start burning (don’t let it brown! it ruins the dish).
throw the thinly diced tomatoes and stir until they start to soften and add 3 tea spoons of paprika.
Add in the tomato puree, the trick here is to have the tomatoes “swim” in puree, but not disappear. the tomatoes need to be visible so their fresh taste won’t go away. trust your eye on this.

then let it simmer while occasionally stirring. add a thin layer of black pepper (freshly ground of course), salt to taste (don’t be shy), and then a brave 3/4 spoon of sugar. stir over and over again (not continuously but with a sense of commitment).

once the sauce is bubbling and the mix is thicker than it is runny, give it a swift spill of olive oil (make a line shape), and finally, the egg. DON’T STIR. leave it whole. then let it simmer for ~5 more minutes with the egg inside (or until you reckon the egg is done). if you like a well cooked yolk, cover the pan throughout this interval. make sure your final result is thick and aromatic, borderline burnt (but not really). I recommend eating it directly from the pan with white bread.

now you have a surprisingly minimalistic yet delicious Shakshuka.